Fix Bug in Synology DaVinchi / Premier Exports Crashing on MacOS
Many users have run into issues with issues with their video editing software crashing during exports on MacOS

Overview
The past few months I have seen a ton of random errors with video editing users using DaVinchi Resolve / Premier Pro / Final Cut Pro on MacOS during an export. This issue cropped up randomly and I have not been able to figure out if it is a MacOS or a Synology issue, but it seems to be somewhere in-between. Finally I ran across this which solved my issues!
What is the Problem?
The actual problem is a specific and reoccurring symptom: the SMB share randomly crashing, primarily during exports. I have had tons of clients run into this issue, where during heavy editing or exports (and even some users using Lightroom) the NAS will simply crash and disconnect from MacOS finder. The Synology itself seeming to be unaffected (no other users get the disconnect at that time)
From looking at the fix, it seems like MacOS is having trouble getting the proper signing negoated with Synology. Future more this issue has been around since at least October 2024.
What is the Solution?
The solution is actually fairly simple! Editing the /etc/nsmb.conf to force signing to be required. This is done via command line terminal, which if you are unfamiliar with, can be daunting, but in this case should not be too hard. I will give a general warning to be careful before executing terminal commands as they assume you know what you are doing, and you can brick your system.
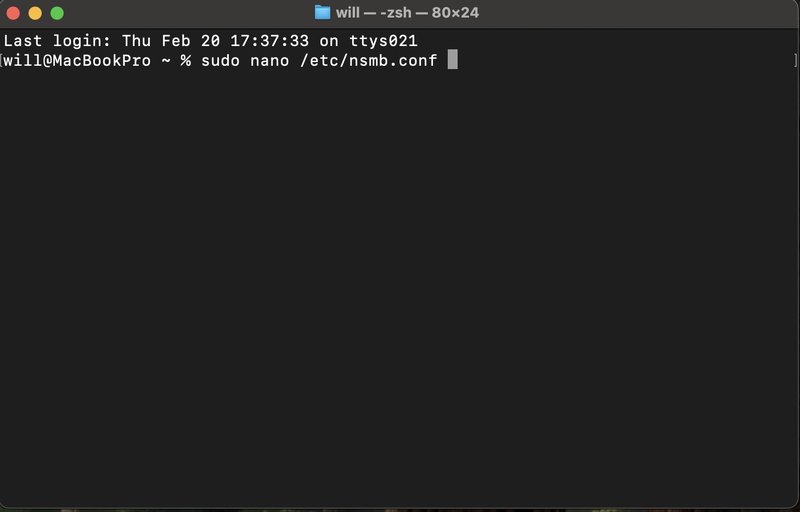
Step 1. Open the NSMB.conf file
To do this you will need to open up MacOS terminal and type sudo nano /etc/nsmb.conf (this opens the /etc/nsmb.conf file in the nano editor as a super user). This file is used to configure the SMB settings the Mac uses to communicate this the Synology.
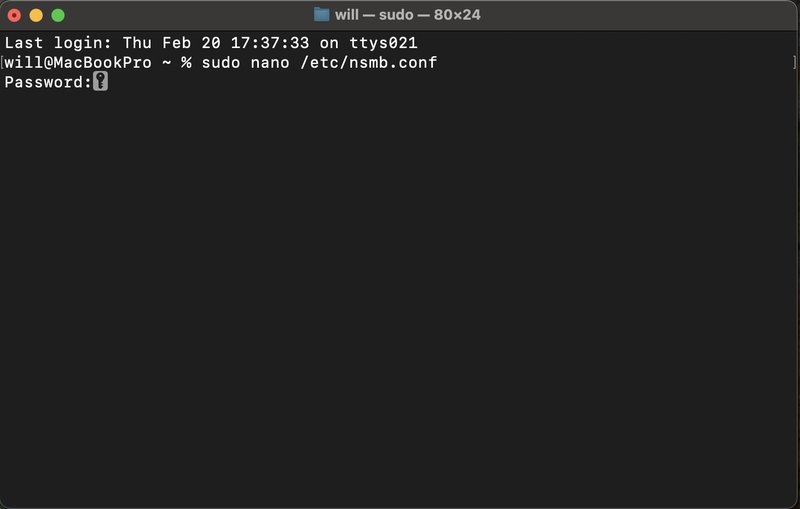
When you do this, you will need to then type your MacOS password in the bar and hit enter. The bar will not show anything typing, but it is working!
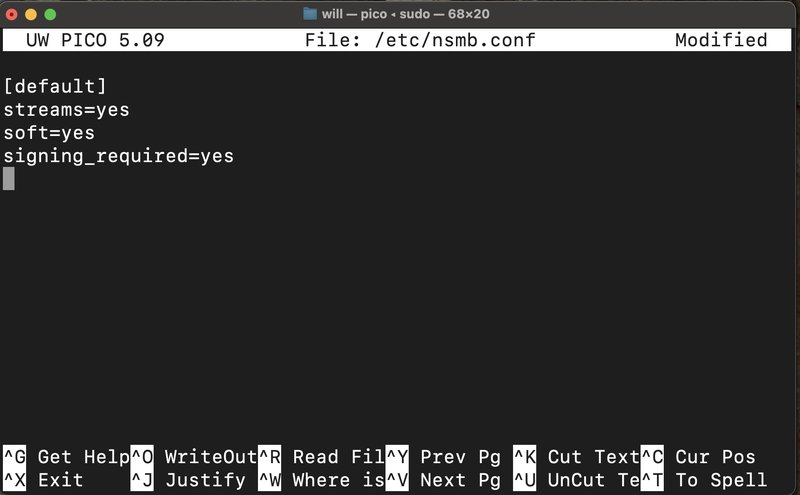
Step 2: Edit the NSMB file
After you have put in your password we should open into an empty file. If you have anything in there, you can either delete it, or merge this in.
Paste in:
[default]
   streams=yes
   soft=yes
   signing_required=yes
Step 3: Close, Save, Remount
Now just save the file, and restart to make sure the mount is reapplied. To close the file hit "ctl+x" then "y" and enter and the file should be saved. Finally reboot your computer to ensure the mount is fully reset and it should be fixed.